
Integration Guide
Webflow
Publish blog posts as items in a Webflow CMS collection.
How It Works
Every post you publish becomes a live item in your Webflow CMS collection. Title, body, description, slug and featured image are filled in from your Azuqe blog. Republish updates the same item. Remove deletes it from your live site.
Setup Steps
1
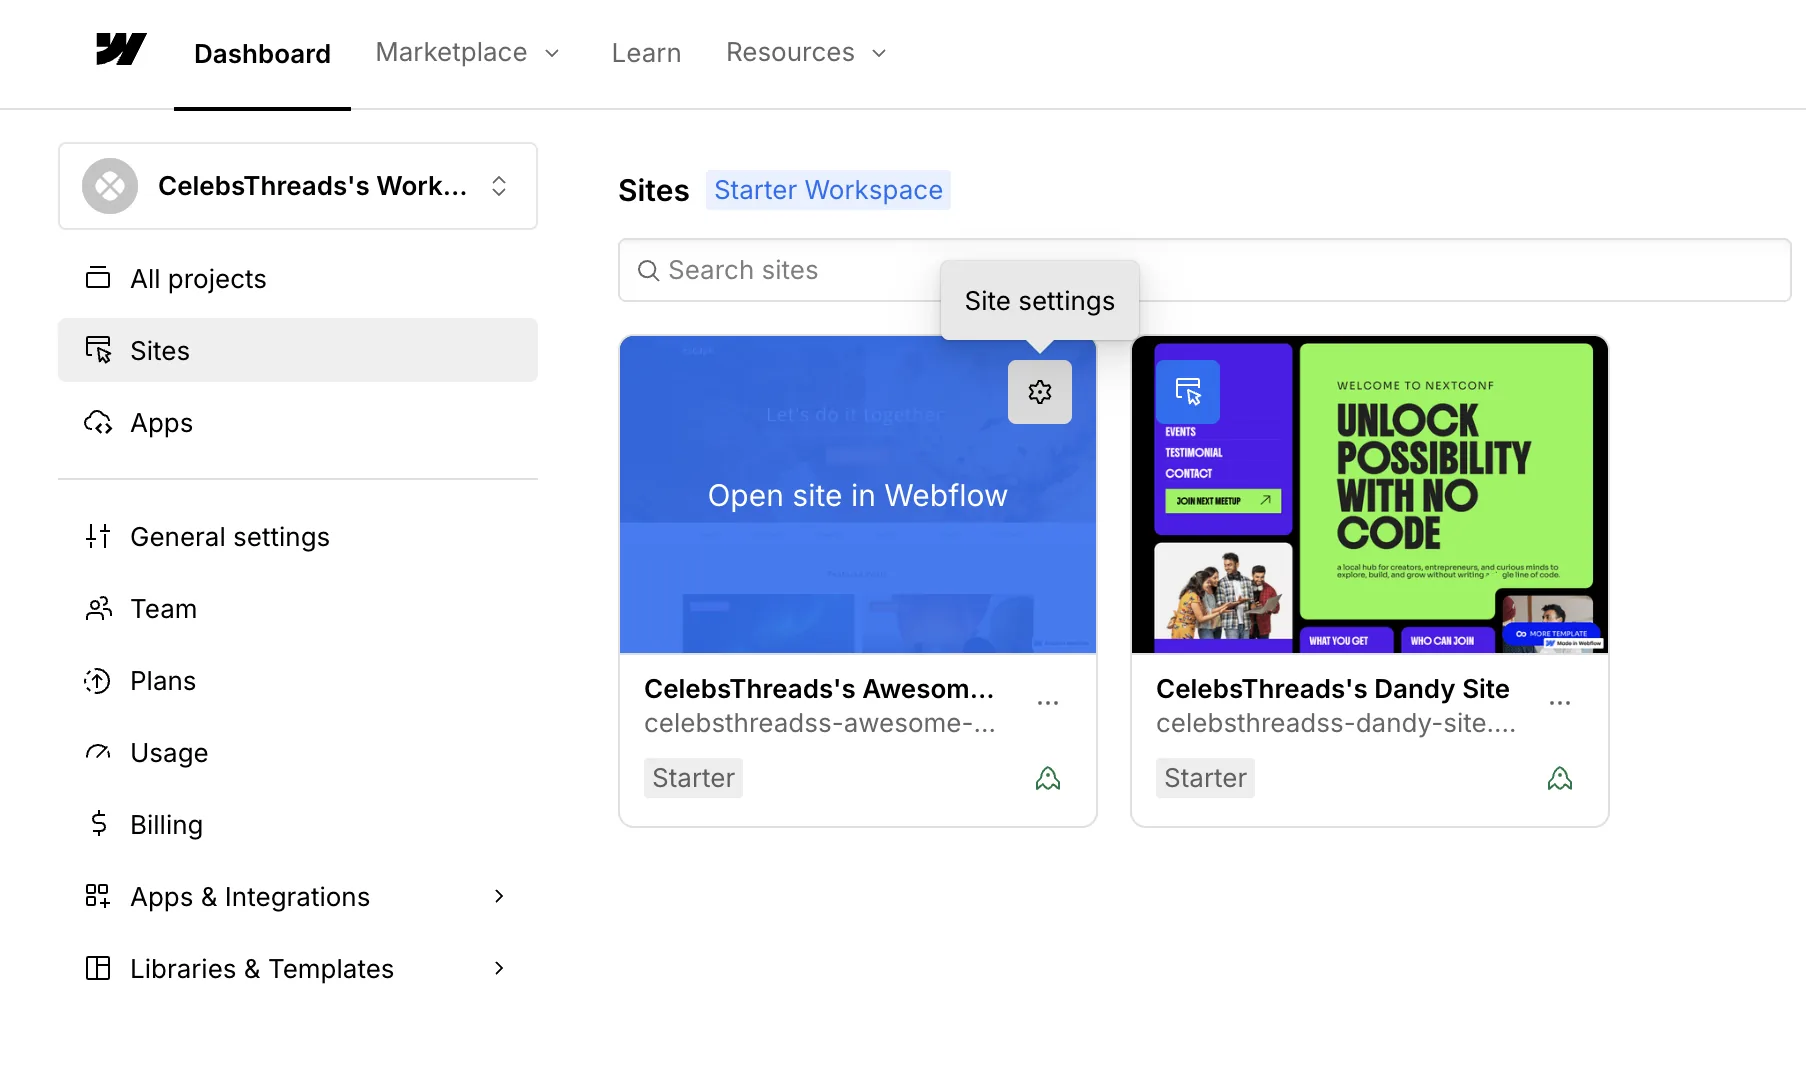
Open your site settings in Webflow
- In your Webflow Dashboard, open the site you want to connect to.
- Click Site settings in the top right.
2
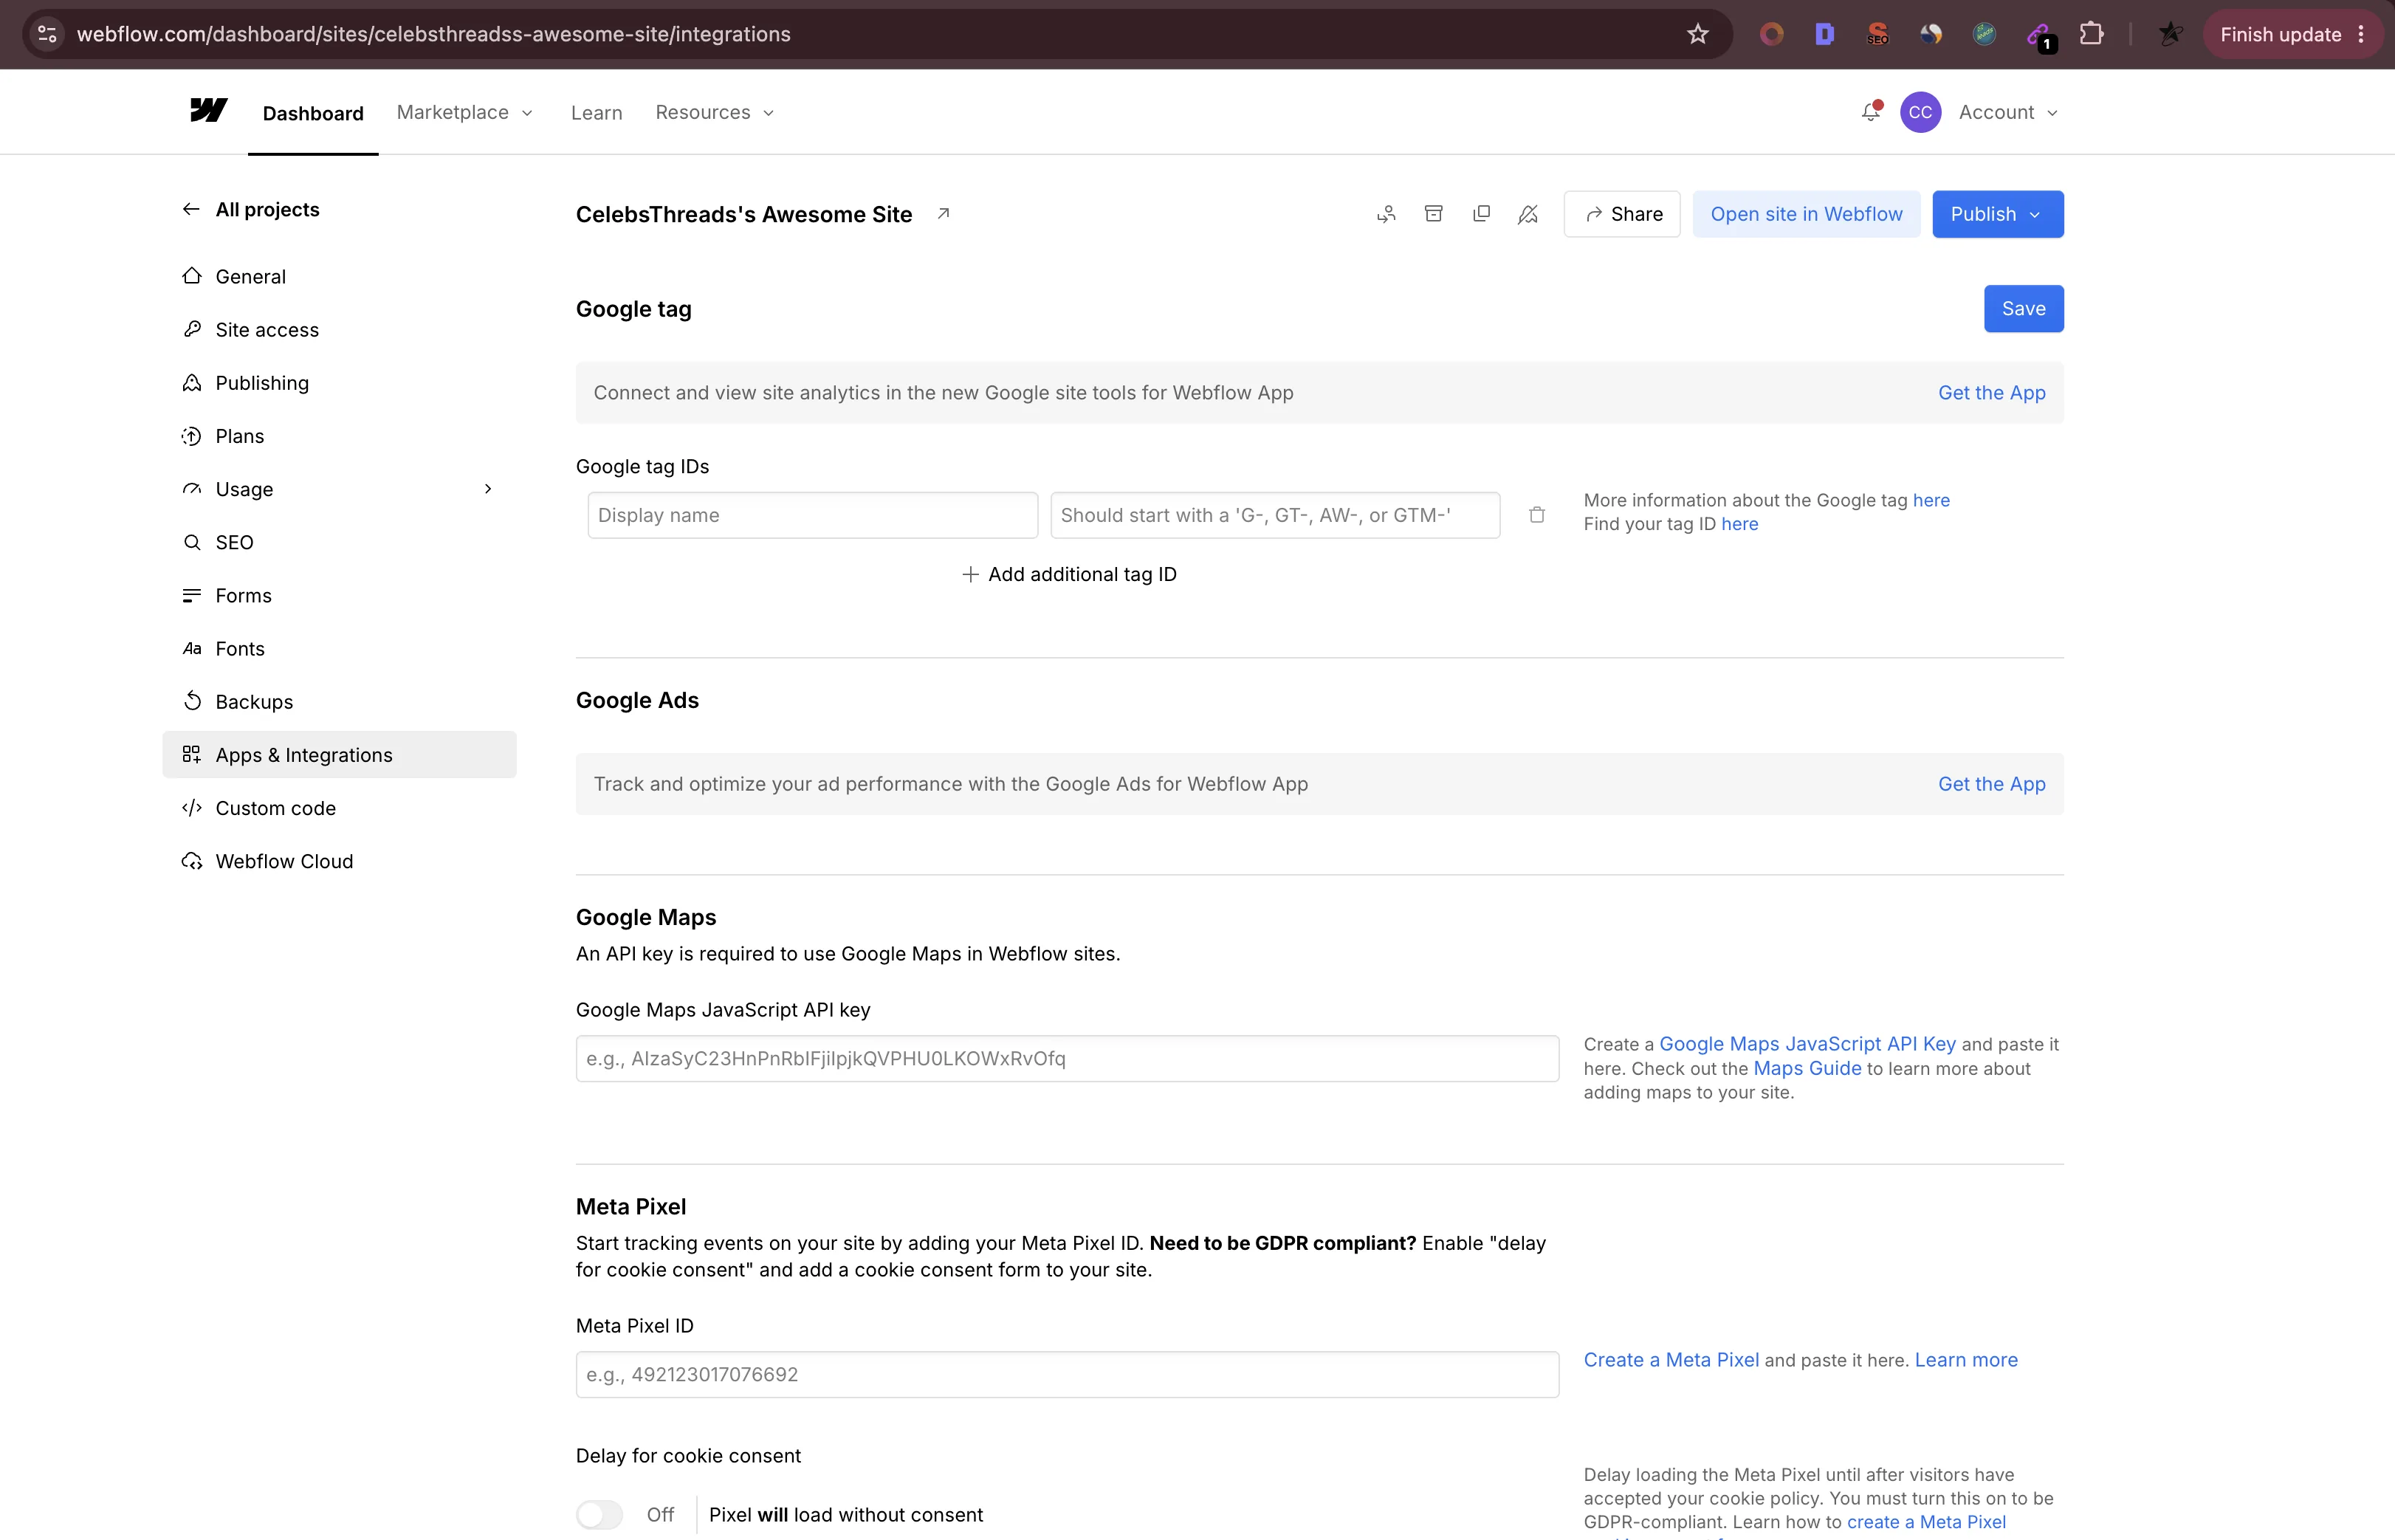
Go to Apps & Integrations
- In the left sidebar, click Apps & Integrations.
- Scroll to the API access section at the bottom.
3
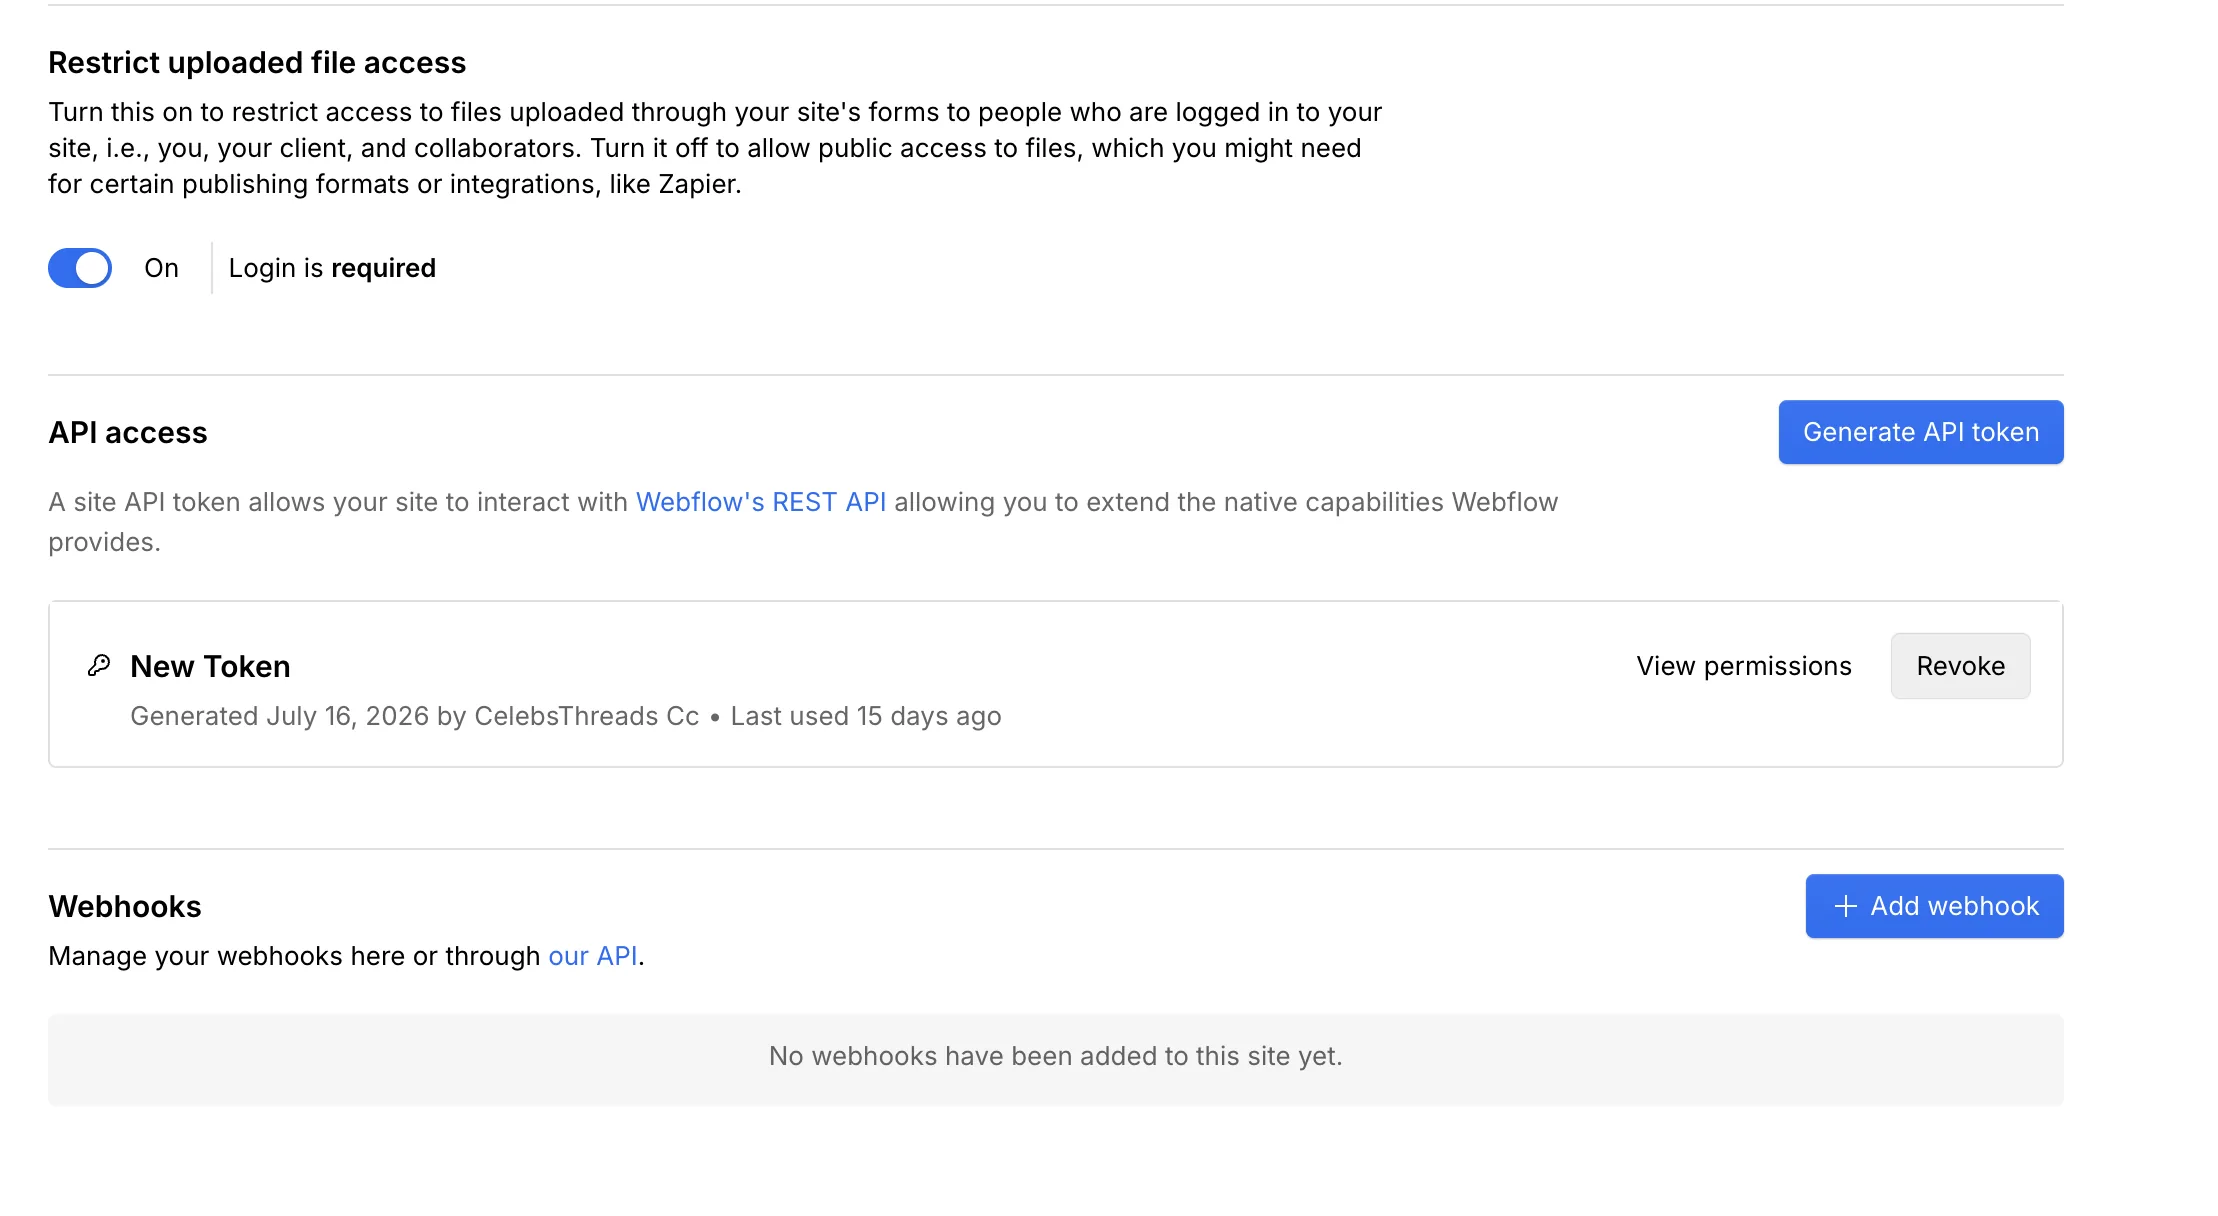
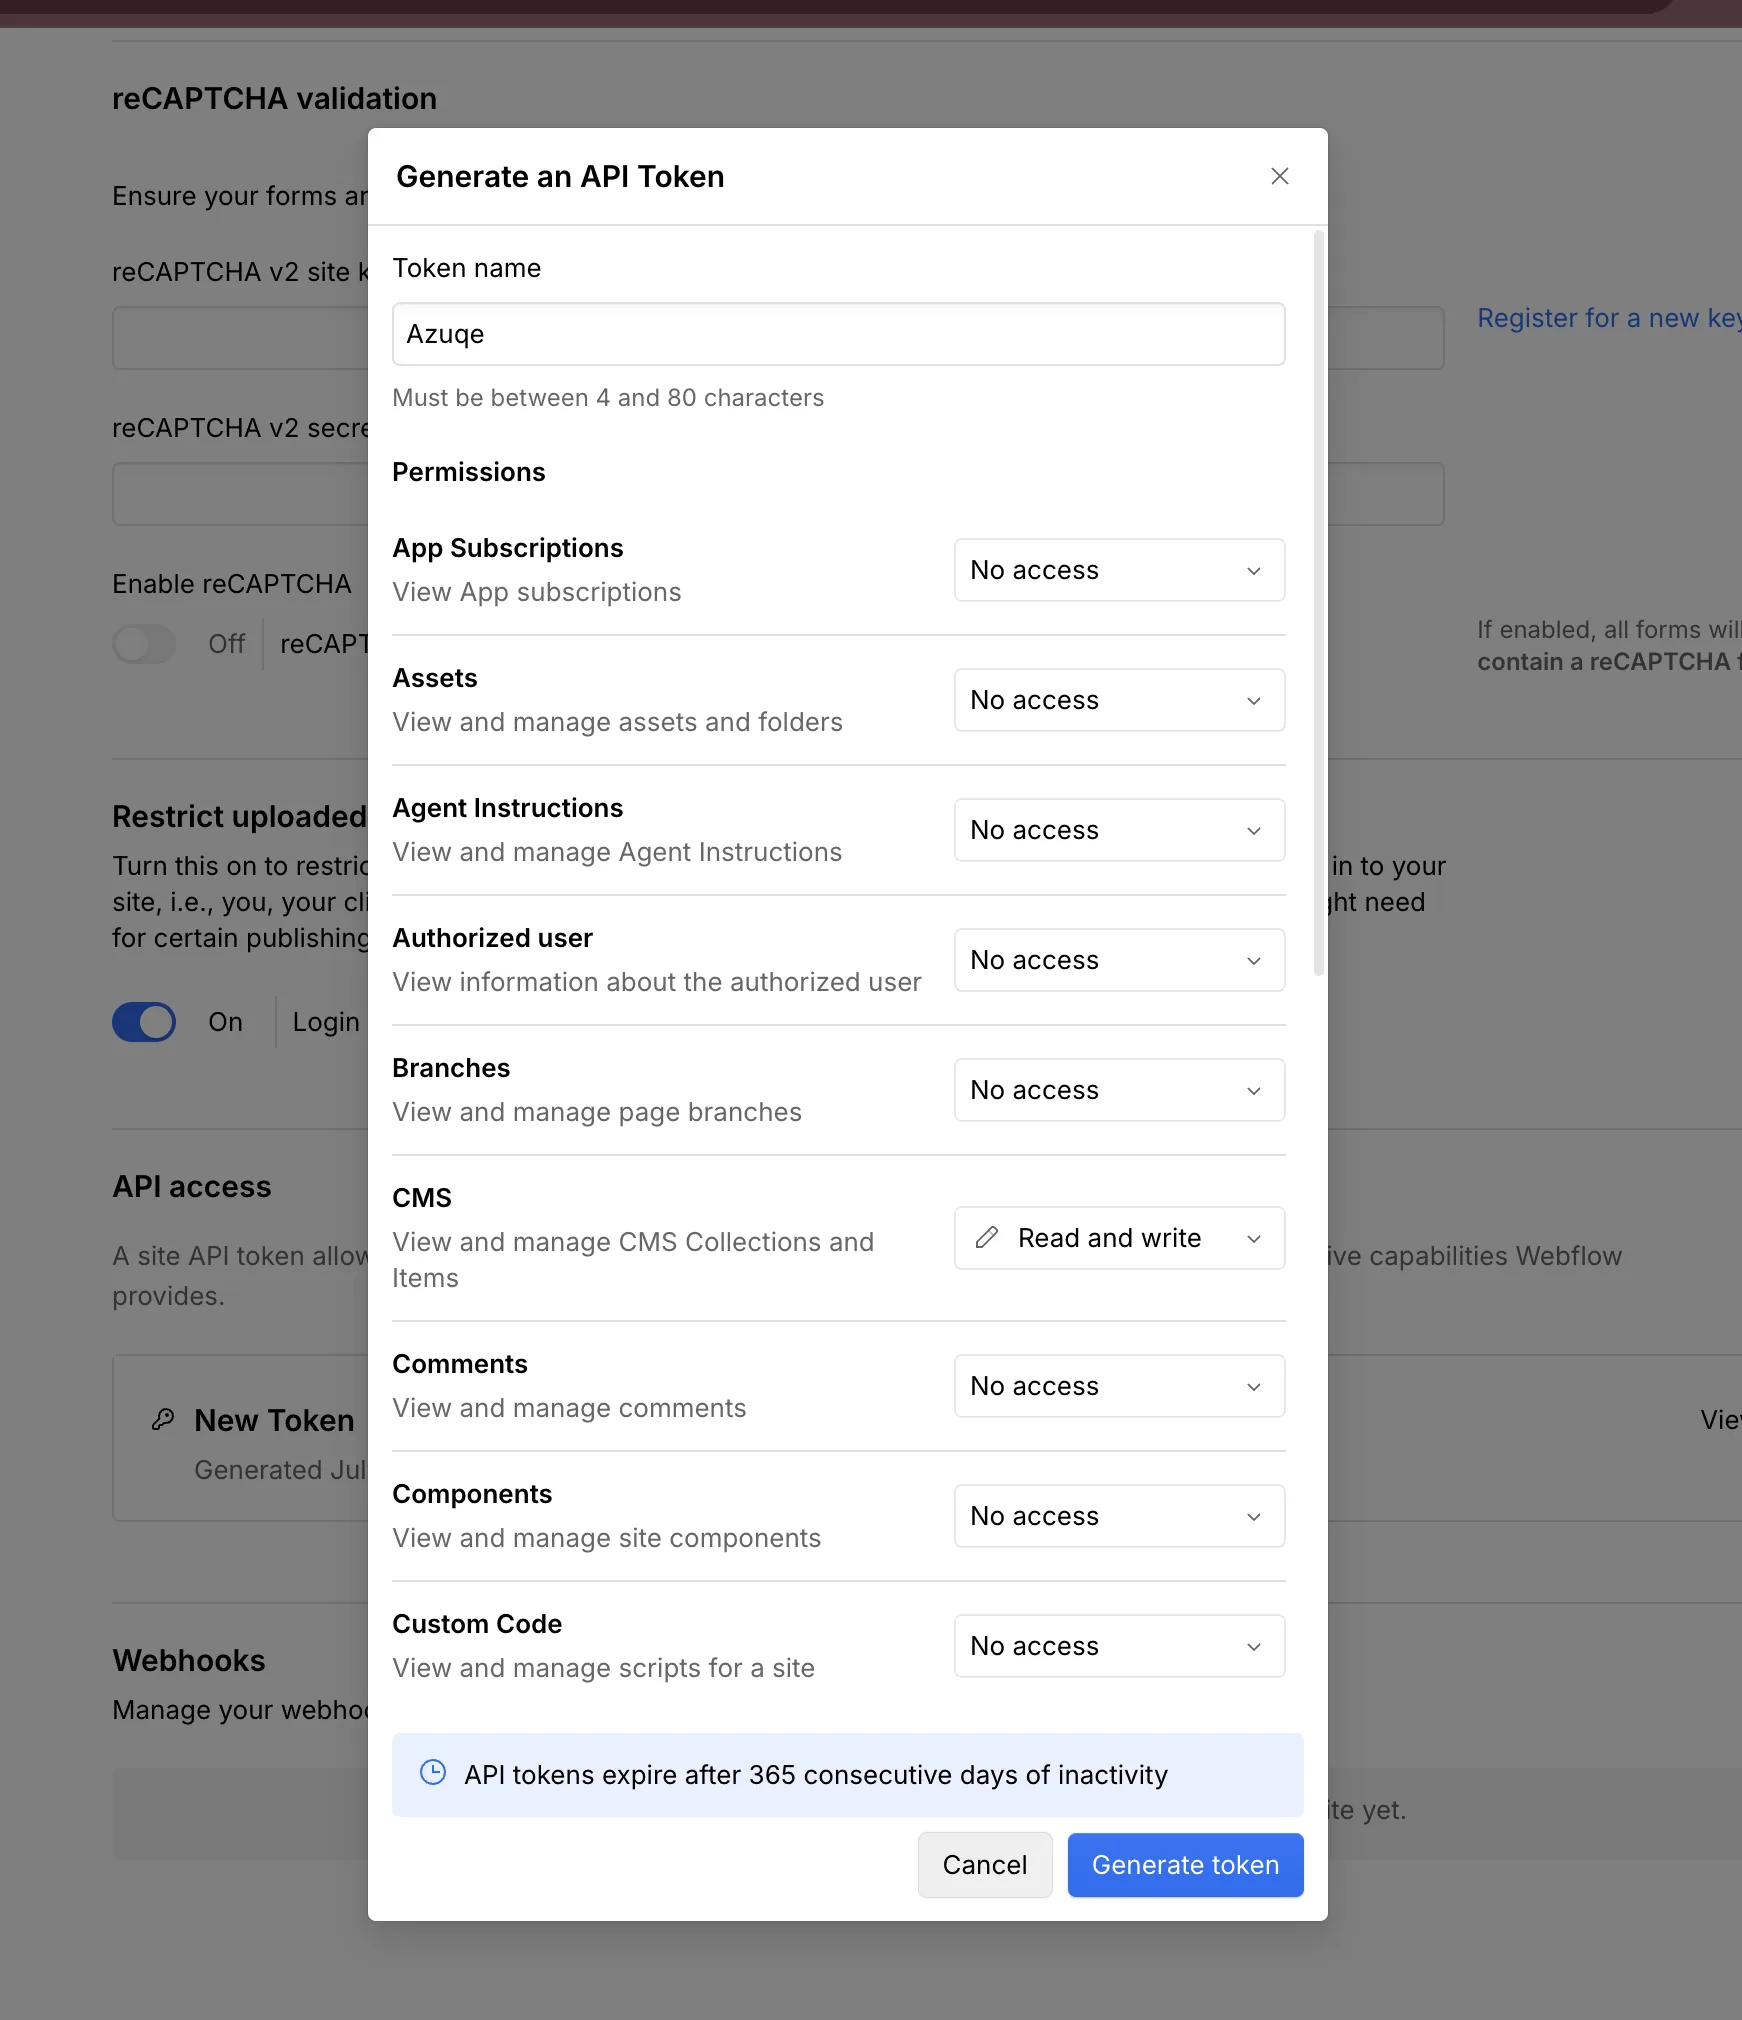
Generate an API token
- Click Generate API token.
- Name it Azuqe.
- Turn on: CMS (Read and Write), CMS (Publish), Sites (Read).
- Click Generate and copy the token. Webflow only shows it once.
4
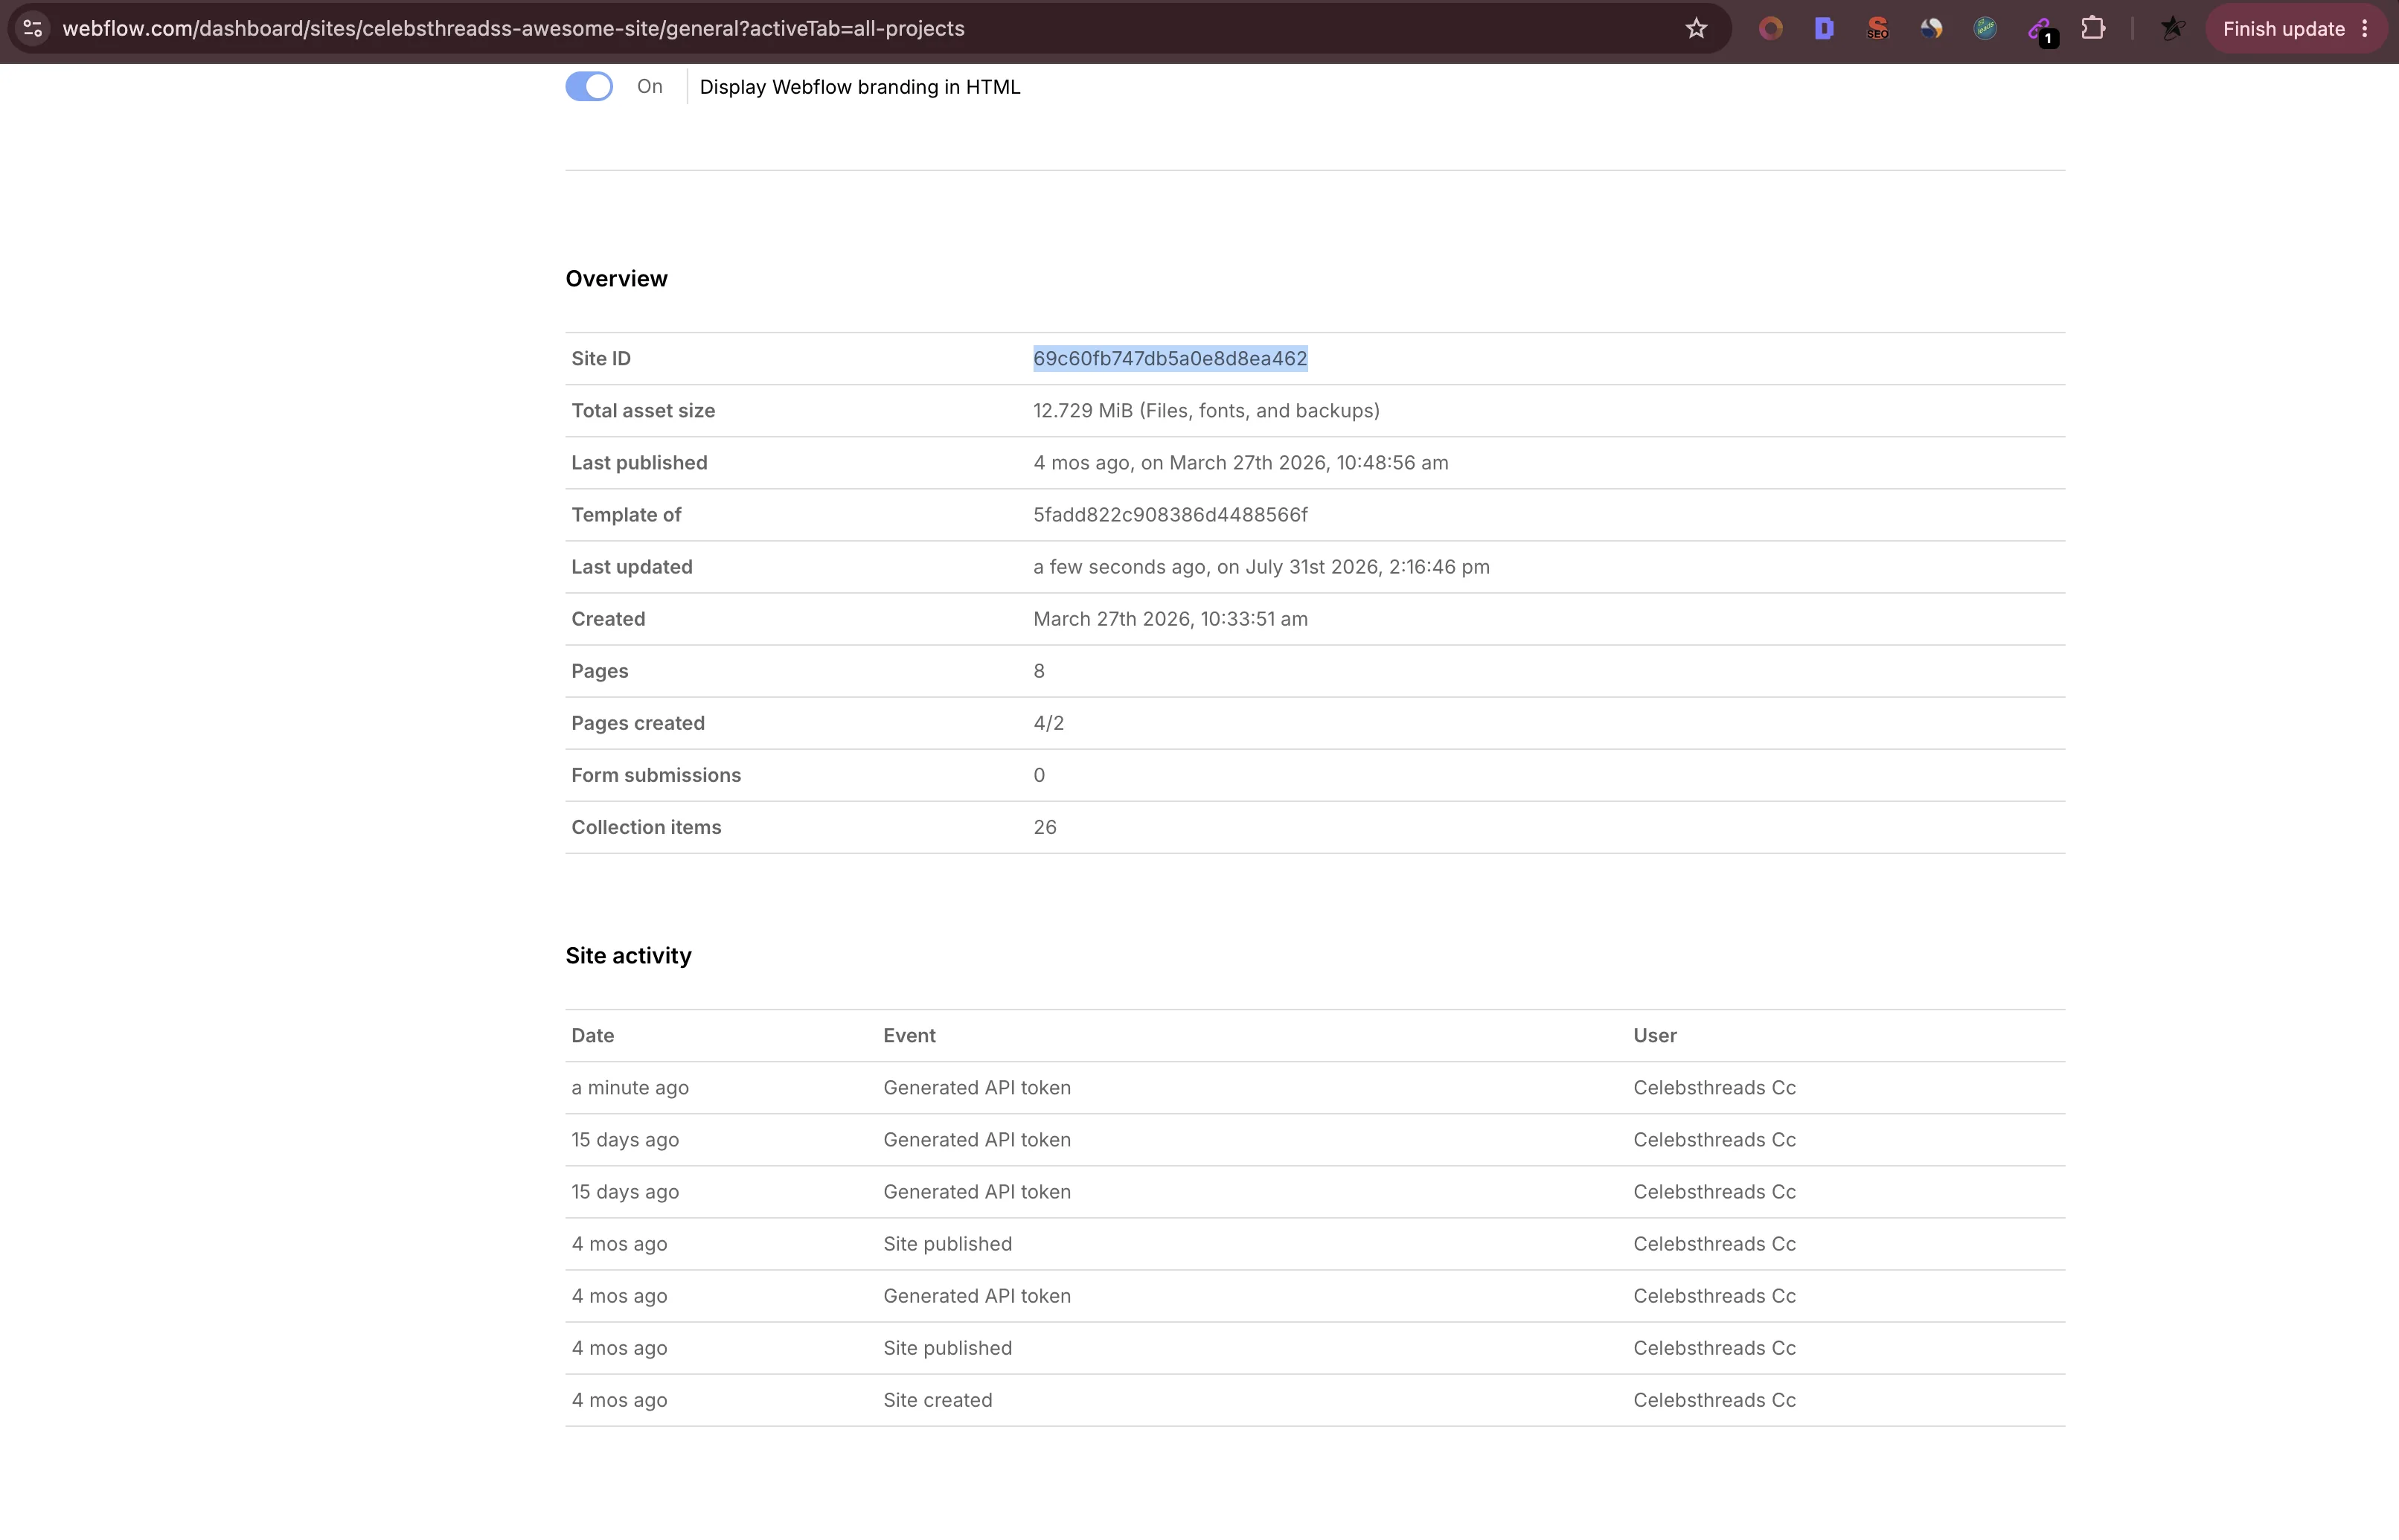
Copy your Site ID
- Still in Site settings → General, scroll to the Site ID row and click Copy.
5
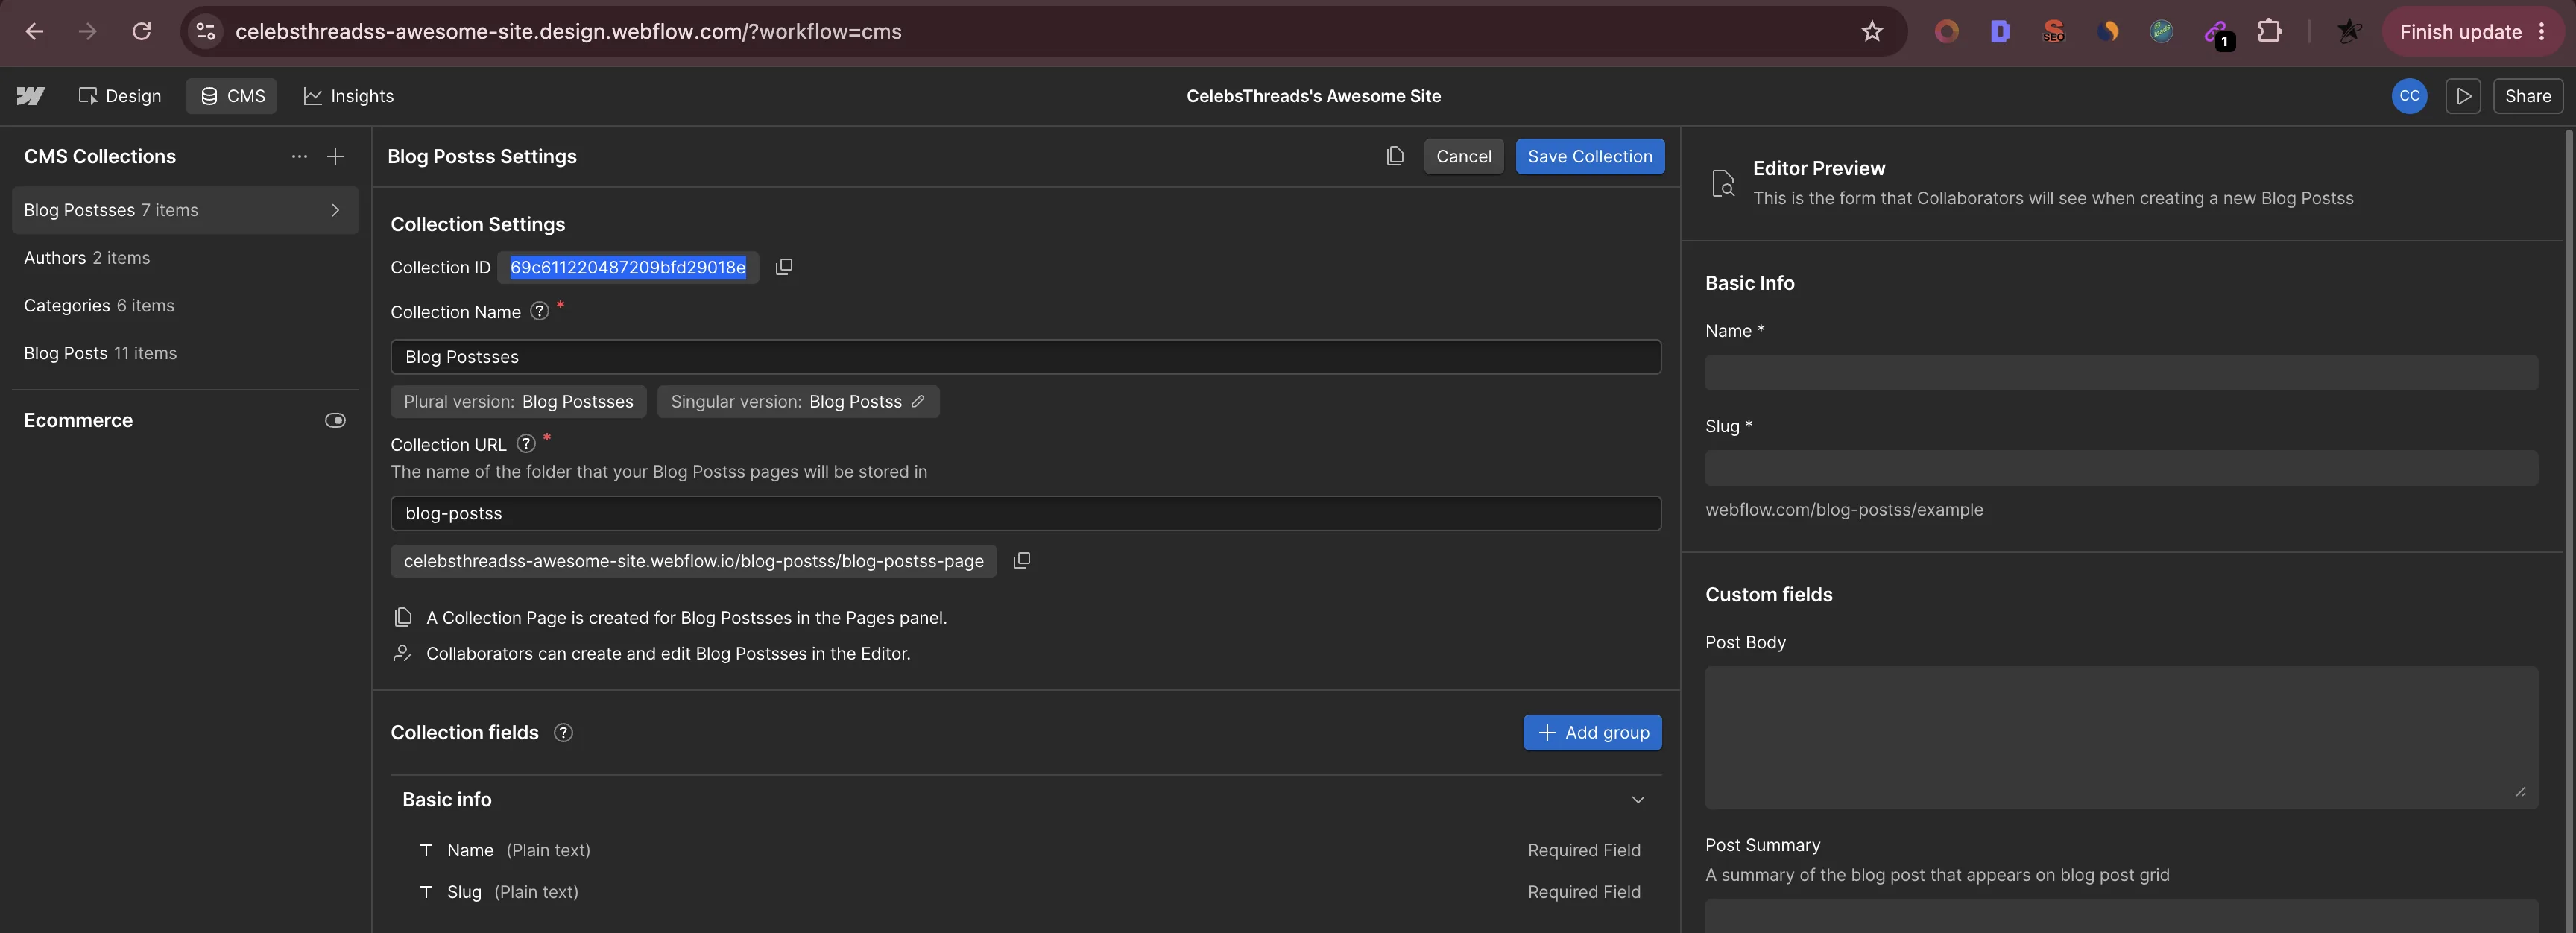
Copy your Collection ID
- Open the CMS icon in your site dashboard's left rail.
- Click the collection you use for blog posts (e.g. Blog Posts).
- Click the settings gear at the top right, then copy the Collection ID.
6
Connect in Azuqe
- In Azuqe, open Connected Apps → Webflow → Connect.
- Paste your API token, Site ID and Collection ID.
- Click Connect. Azuqe runs a quick check to make sure the token can reach your collection.
What Gets Synced
One-click publish as a live CMS item — no manual copy-paste.
Meta description and image mapped to your collection's fields.
Republish updates the same item — no duplicates.
Remove deletes the item from both live and staged versions.
Troubleshooting
Ready to connect?
Open your dashboard and navigate to Connected Apps to link Webflow.